Platform Administrators can access Phriendly Phishing via Single Sign-on (SSO). Enabling this feature, allows platform admins to log into Phriendly Phishing using their Network or work credentials.
If you have configured Learner Hub SSO, you are required to create a new Enterprise App for your Admins.
- Create an Enterprise Application in Microsoft Entra ID. Skip to step 2 if an App has already been created for Platform Admins.
- In the Overview page of the Enterprise Application Select Single Sign-on > SAML.
- Under Basic SAML Configuration, click the edit or the pencil icon
-
Select Add Identifier and Add Reply URL and enter below details and click Save.
- Identifier : PH2System
- Reply URL : https://launch.phriendlyphishing.com/company_admin/saml/acs
- Under SAML Certificates, download Certificate (Base64).
-
Open the downloaded .cert file in notepad,
- Copy the text and go to https://www.samltool.com/fingerprint.php.
Paste the copied text on X.509 Cert field
Select Algorithm "sha256" and click Calculate fingerprint.
- In Section 4 - Set up, take note of the Login URL and Logout URL to use later in the next steps.
- Go back to your Phriendly Phishing account, have the Formatted Fingerprint, Log in URL and Logout URL ready (obtained from previous steps) and input per below screenshot
-
and Enable SSO Settings
- Log out from the platform and log in again using your Microsoft Credentials.
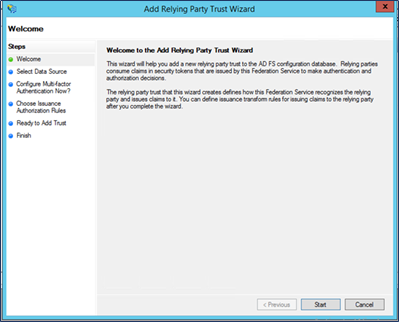
- Open AD FS Management console.
- Click Add Relying Party Trust in the Action panel.
-
Click Start.
- On the Select Data Source step, Select Enter data about the relying party manually for Data Source, then click Next.
-
Enter a name for Display name (as below), then click Next.

- Choose profile step, select AD FS profile.
- Leave Configure Certificate windows as default, then click Next.
-
In Configure URL, select Enable support for the SAML 2.0 Web SSO protocol and enter consumer. URL (https://launch.phriendlyphishing.com/company_admin/saml/acs)

-
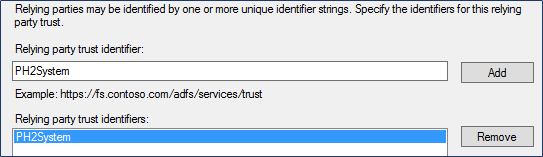
On Configure Identifiers step type PH2System, click Add > Next.
- Don’t take any action on Configure Multi-factor Authentication Now step, click Next.
- For Choose Issuance Authorization Rules step, select Permit all users to access this relying party, click Next.
-
Make sure Opens the Edit Claim Rule is checked and then click Close to finish the wizard.
The claim rule editor should open by default. If it doesn’t, select Relying Party Trust and click ‘Edit Claim Rules’ in the Actions Panel.
- Add the claim rules by clicking Add Rule
- Click Add Rule.
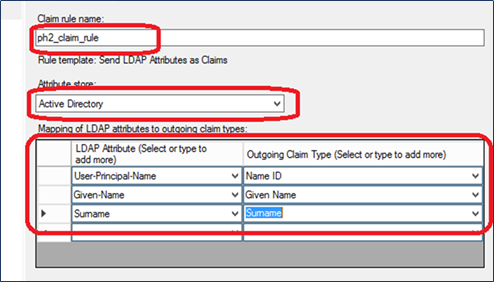
- Select Send LDAP Attributes as Claims for Claim rule template and click Next.
- Enter the Claim rule name: ph2_claim_rule and select Active Directory for Attribute store
-
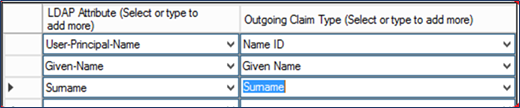
Set Mapping LDAP attributes to outgoing claim types as below and hit Finish.
-
Setup PH2_SP Relying Party Trust. Double-click on the new Relying Party Trust PH2_SP to open the properties window (or click properties on Right Actions Panel).

-
Switch to the Endpoints tab, click Add SAML and on the new window configure as below:
- Endpoint type : SAML Assertion Consumer
- Binding : POST
- Trusted URL : https://launch.phriendlyphishing.com/company_admin/saml/acs"https://launch.phriendlyphishing.com/company_admin/saml/acs
-
Click Add SAML button to add new endpoint.
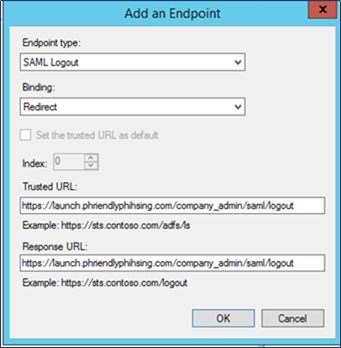
Details:
- Endpoint type : SAML Logout
- Binding : Redirect
- Trusted URL : https://launch.phriendlyphishing.com/company_admin/saml/logout
- Response URL : https://launch.phriendlyphishing.com/company_admin/saml/logout
-
Open Signature tab, click Add
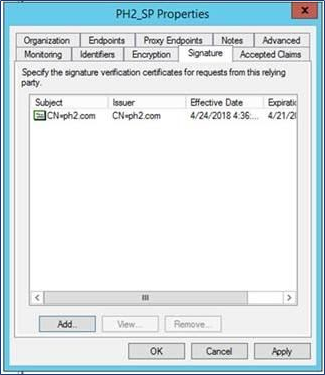
- Please download the required Phriendly Phishing Certificate then navigate to the PhriendlyPhishing.crt, click Open and Apply.
- Get a fingerprint from ADFS. Go to the ADFS management console. Navigate to AD FS > Certificates (as pictured below). Then double-click on Token-signing.
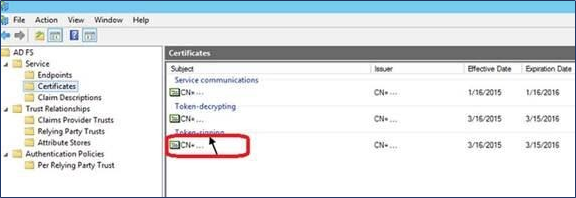
-
Open the ‘Details’ tab. Copy the Value of the Thumbprint field. This will be used in the next section.
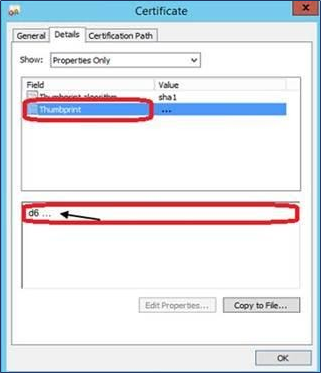
-
Set up Authentication Policies. Open the ADFS management console, and navigate to path ADFS > Authentication Policies.
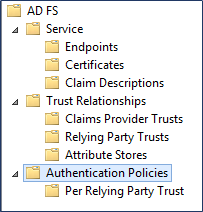
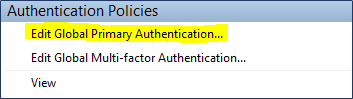
- Click Edit Global Primary Authentication… on the right action panel.
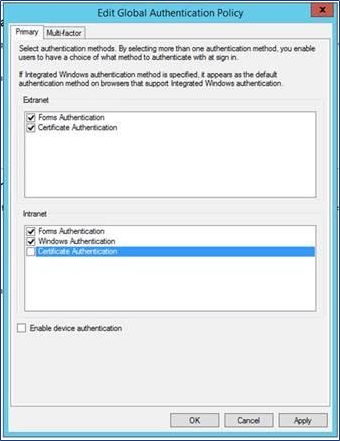
- Within the Edit Global Authentication Policy window navigate to the Primary tab, within the Extranet window select Forms Authentication and Certificate Authentication.
-
Within the Intranet window select Forms Authentication and Certificate Authentication. Then click Apply and OK.
- Go back to Phriendly Phishing platform, navigate to Settings
> User Synchronisation> Admin SSO Set Up and expand SSO Settings.
-
Enter the below required fields under SSO Settings. Replace (IdP domain) with your AD FS Identity Provider domain.
Field Input Sign-in page URL
https://(IdP domain)/adfs/ls
Logout page URL
https://(IdP domain)/adfs/ls?wa=wsignout1.0
Certificated Fingerprint
Value copied in Step 17 above
- Click
- Click Generate SSO Synchronise Script in the platform under Admin Sychronisation to download your required PowerShell script .
- Run the PowerShell script manually from any AD-connected machine. Run the downloaded PowerShell script with Administrator privileges. Note: ‘Remote Server Administration Tools’ will need to be installed on the machine that you are running the PowerShell script.
- When prompted enter your Authentication Token which is obtained under Admin Sychronisation within the Phriendly Phishing platform.
- Please wait until the end of the process. PowerShell will close once complete.
-
Sign in to Phriendly Phishing using you ADFS login details.
Requirements :
- Super Admin access to your Okta instance is required to create your Okta Application. The Super Admin role has the highest permissions of all the admins within Okta.
- If you have already set up an Okta application for Phriendly Phishing please skip to 2. Configure SAML Okta SSO.
- If you have not enabled Okta Admin Synchronisation, ensure that Admins have been added manually.
1. Create App Integration
- Access your Okta Administration application with Super Administrator privileges and switch to Admin.
- Navigate to Applications > Create App Integration.
- Select the radio button SAML 2.0 > Next.
-
Set the App name to Phriendly Phishing or a preferred name of your choosing.
Set App Visibility to "Do not display application to icon to user"
-
Under Configure SAML, fill out fields with below details.
- Single sign-on URL : https://launch.phriendlyphishing.com/company_admin/saml/acs
- Check the box : Use this for Recipient URL and Destination URL
- Audience URI (SP Entity ID) : PH2System
- Name ID format : EmailAddress
- Application username : Email
- Update application username on : Create and update
- Under Configure SAML, Show Advanced Settings
- Fill out fields per below screenshot
- For Signature Certificate
- Download PhriendlyPhishingCertificate.crt provided with this guide.
- Click
and upload the downloaded certificate. Once completed, you will see image below.
-
Complete the SAML Config settings as below.
- Single Logout URL : https://launch.phriendlyphishing.com/company_admin/saml/logout
- SP Issuer : PH2System
- Click Next. Ensure below box is ticked before clicking Finish.
3. SAML Signing Certificates
- After completing above and clicking Finish, you will be taken to the created App, Sign On tab.
- Scroll down to SAML Signing Certificates and Generate a new Certificate.
- Download the certificate and open the file any text file application.
- Open https://www.samltool.com/fingerprint.php and paste the X.509 Certificate text to the ‘X.509 Cert’ field. Algorithm should be sha256. Click Calculate Fingerprint.
- Copy the Formatted FingerPrint, paste it in a text file application and keep for later use.
4. Configure SSO in Phriendly Phishing
- Log in to Phriendly Phishing. Navigate to Settings > User Synchronisation > Admin SSO Set-up > SSO Settings.
- Expand SSO Settings in the platform and fill out below information taken from Okta Admin Account. Navigate to the created App, Sign On tab > SAML 2.0 > More details. Once added, Save Settings.
- Test by logging in to Phriendly Phishing platform with your Okta Credentials.
Comments
Please sign in to leave a comment.